

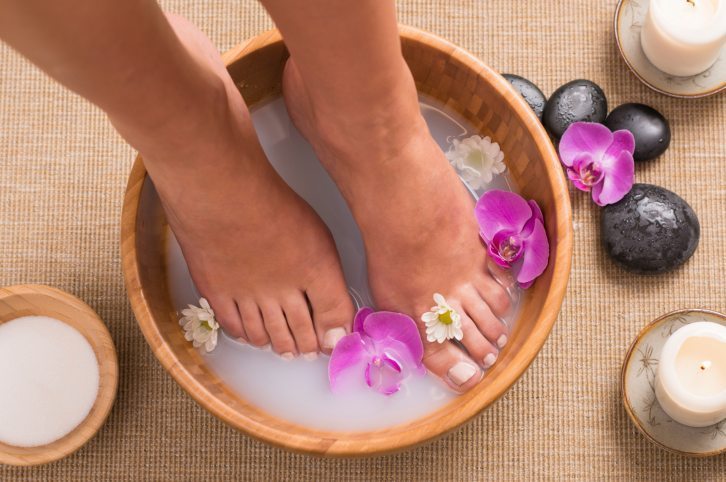
It’s the season of strappy sandals, sundresses, and bright toenail polish. However, many of us take one look at our dry, cracked feet and are tempted to put all that yellow, pink, and green right back in the closet. We’ve got a cure to help your feet spring back into step: do-it-yourself foot soaks! We tested out two different recipes using inexpensive ingredients and adapted them for simplicity.
The first soak is inspired by soothing mint tea. You’ll need:
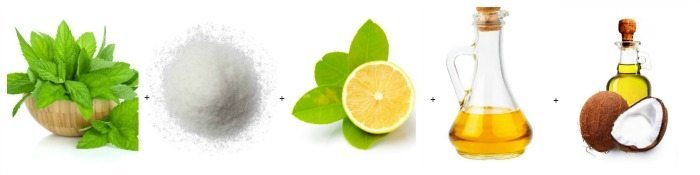
1 Tbsp. peppermint leaves (2 tea bags)
2 Tbsp. salt
1 tsp. lemon juice
1 Tbsp. olive oil
1 Tbsp. coconut oil
Directions:
1. Mix together all the ingredients in a bowl or basin. Tear open the tea bags to add the peppermint leaves, and be sure to use bags that contain 100% tea leaves, rather than “natural flavors”.
2. Mix in 4 cups of warm water. Stir until the salt dissolves, and if your coconut oil is solid, stir until it is dissolved as well.
3. Soak your feet for 20 minutes or up to 45 minutes.
Pros:
- You already know that coconut oil and olive oil soften feet. You may not know that the fatty acids in coconut oil act as an antifungal weapon or that olive oil may help prevent skin cancer.
- Peppermint revitalizes worn-out feet, so this soak feels amazing after a long day at work. Peppermint also battles foot fungi.
- Salt gives you the benefits of the beach right in your bathroom (minus the sand). Since ancient times, saltwater has been used as a stress reliever: the Greeks and Romans used saltwater in their famed baths. Plus, salt cleanses and removes toxins from skin.
Cons:
- When I removed my feet from the soak, the tea leaves stuck to my feet! Luckily, I was able to blast away the leaves in the shower, but I had been expecting to take my feet out of the basin, dry them, and go.
- Oil can make the bathroom floor slippery, so proceed with caution, especially if you have to rinse your feet off in the shower as I did.
- Time is a factor in this foot soak; some may find it easier to apply lotion, put on socks, and let the lotion work overnight.
The second soak requires only two ingredients: distilled white vinegar and water.
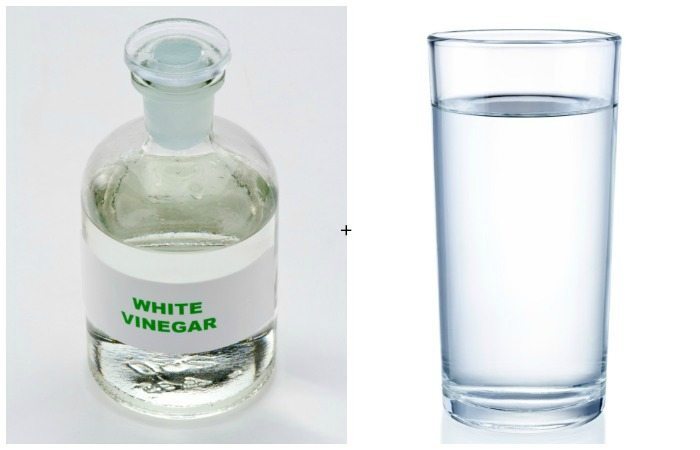
Directions:
1. Pour one cup of vinegar and two cups of warm water in a bowl or basin.
2. Soak feet for 15-20 minutes, and for as long as 45 minutes.
Pros:
- The acid in vinegar fights against food maladies such as athlete’s foot, toenail fungus, warts, and dryness.
- Vinegar exfoliates feet, ridding them of dead skin cells that build up over time.
- The vinegar soak is far easier to mix together and use than the peppermint soak.
Cons:
- You need to be more careful with a vinegar soak than with a peppermint soak. Vinegar could aggravate your feet if you soak frequently, and may cause redness, a rash, or irritation. Many sources suggest checking with a doctor (especially if you have a medical condition) before testing a vinegar soak.
- Vinegar is very smelly, and when I removed my feet from the soak, the smell lingered even after I rinsed my feet.
- I had a tiny cut on one toe that I didn’t notice until about ten minutes into the soak, when the toe began to hurt so much that I had to remove my toes and finish soaking only my heel.
Verdict: Add peppermint to your spring regimen! With moisturizing and anti-fungal benefits, it is able to do for your feet what a vinegar soak does. However, it will be done without the potential irritation and stinky odor!
How do you take care of your feet?
For more on Beauty, take a look at our features here.
All images via Thinkstock


 foot soaks!)